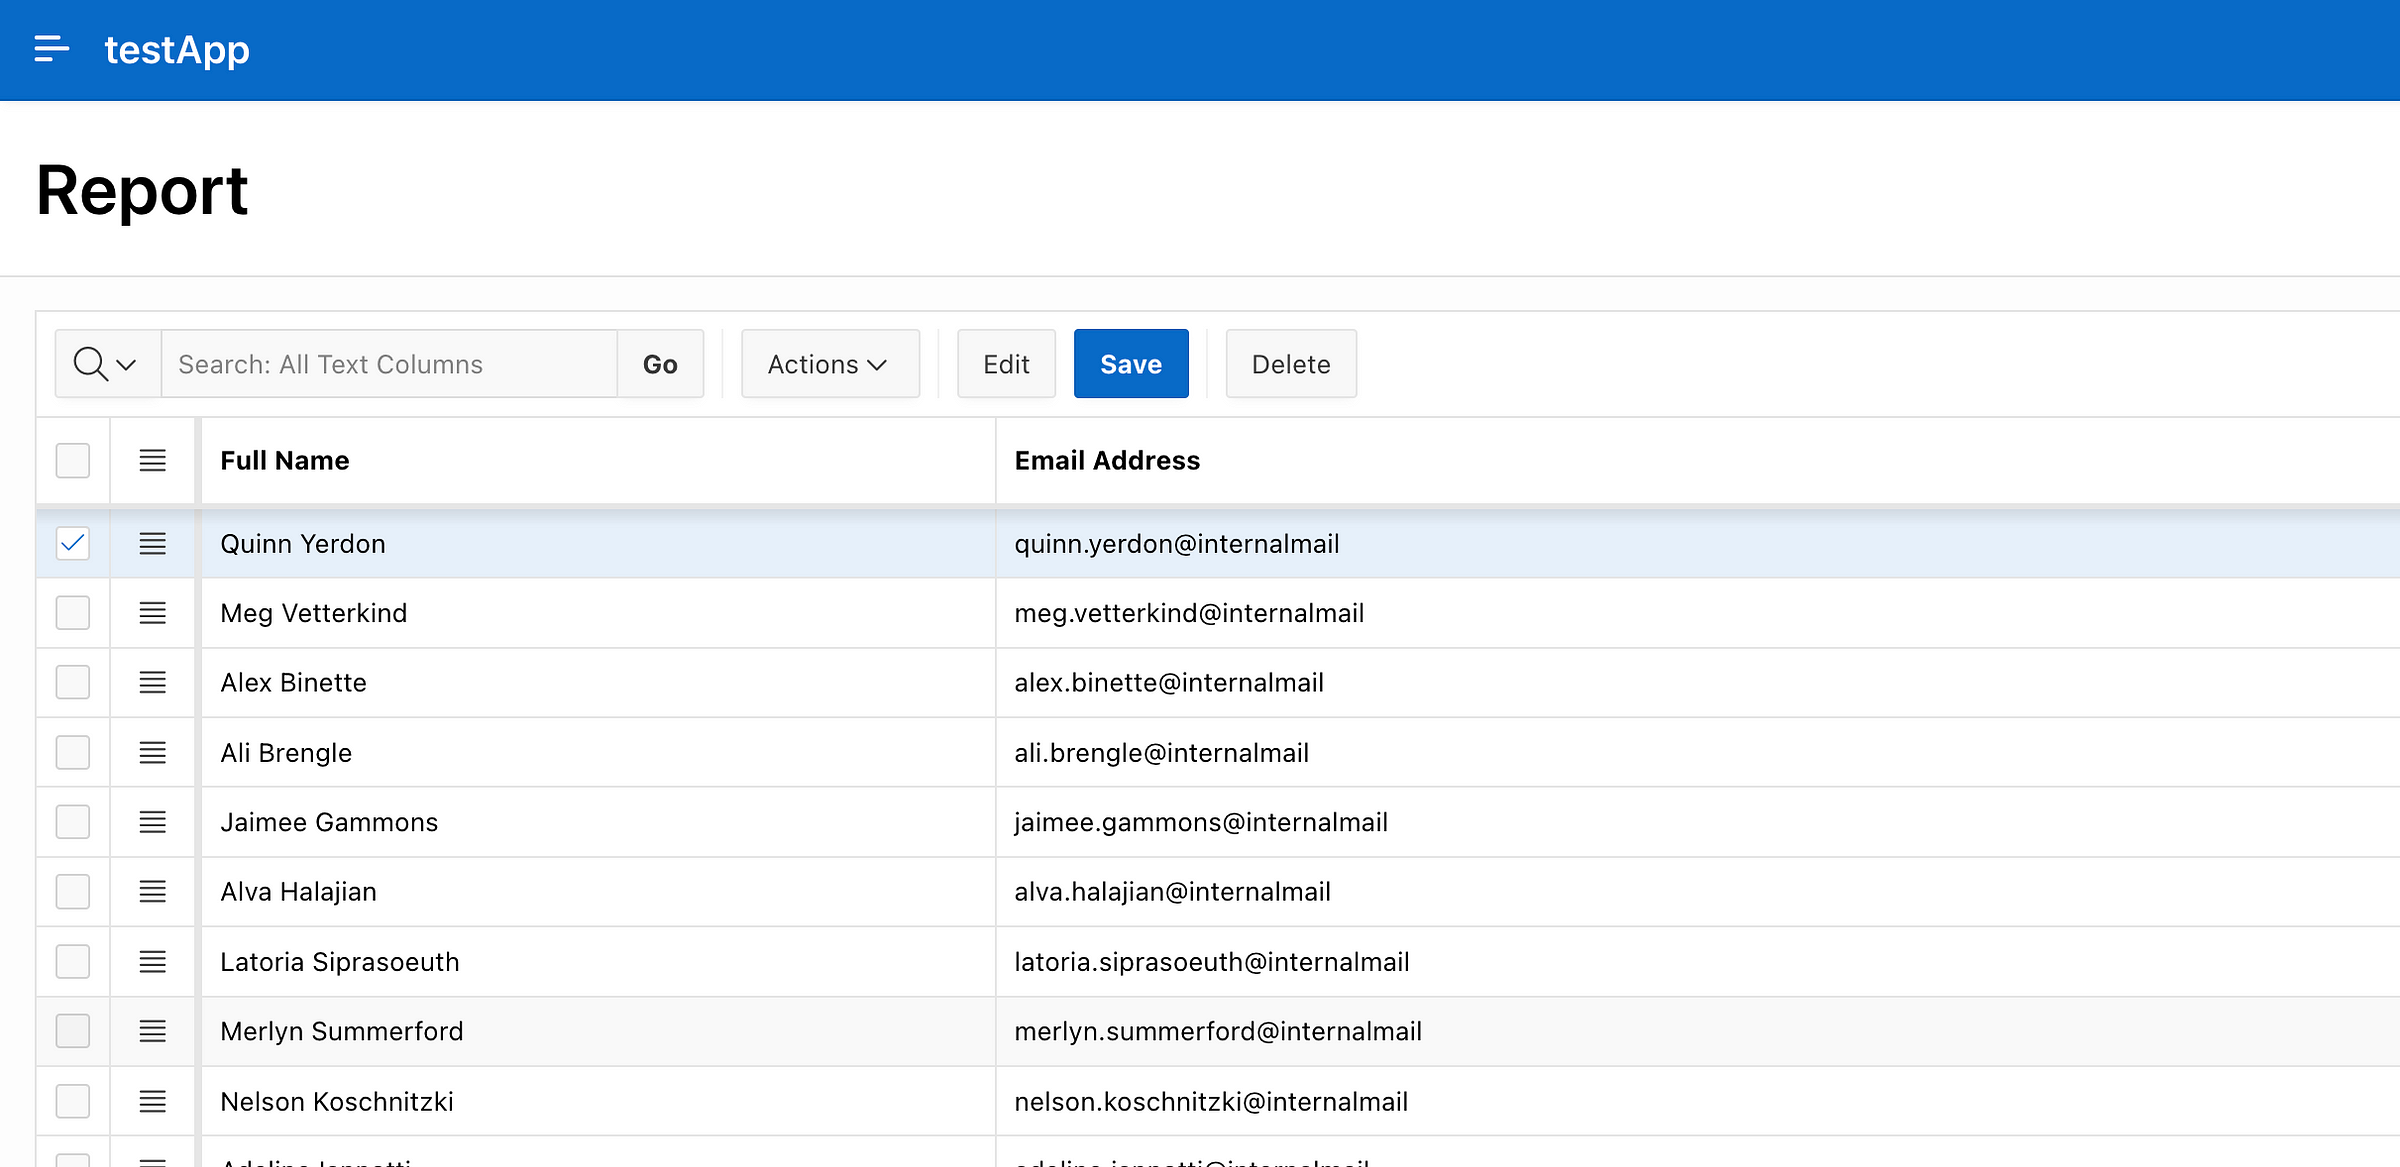
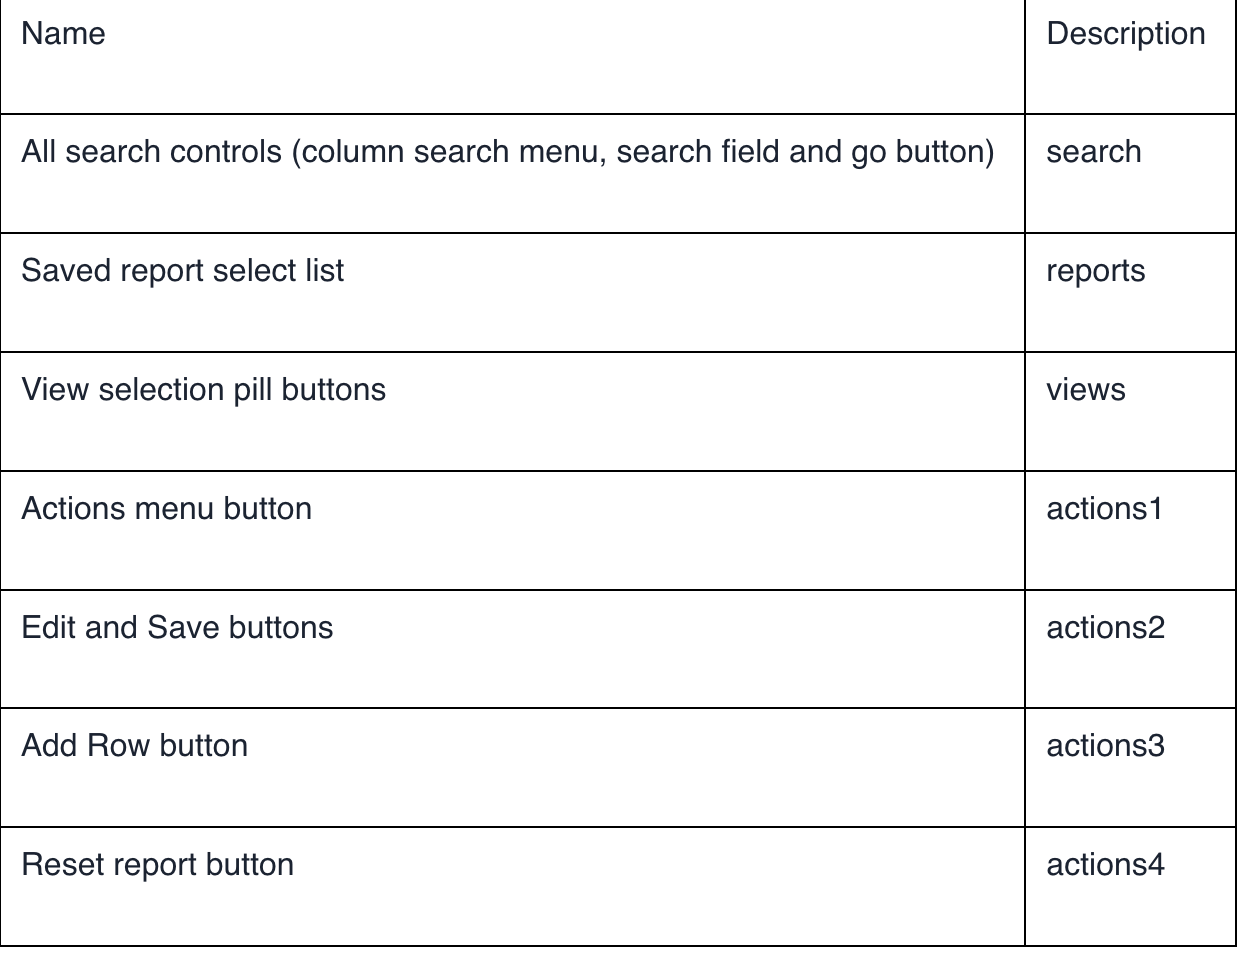
To begin, let’s familiarize ourselves with the layout of the Interactive Grid toolbar. The toolbar is divided into seven distinct sections, each serving a specific function. Understanding this layout is crucial as we’ll use it to strategically assign our custom buttons. Here’s an overview of these sections:
Step by step guide :
Navigate to your Oracle APEX application and locate the page containing the Interactive Grid where you want to add the custom button.
1. Enable Edit and Delete Options
- Click on the Interactive Grid region to select it.
- In the “Properties” pane, find and enable the following options under the “Attributes” section:
- Edit: Set to “Enabled” to allow users to edit rows directly in the grid.
- Delete Row: Set to “Enabled” to allow users to delete selected rows from the grid.
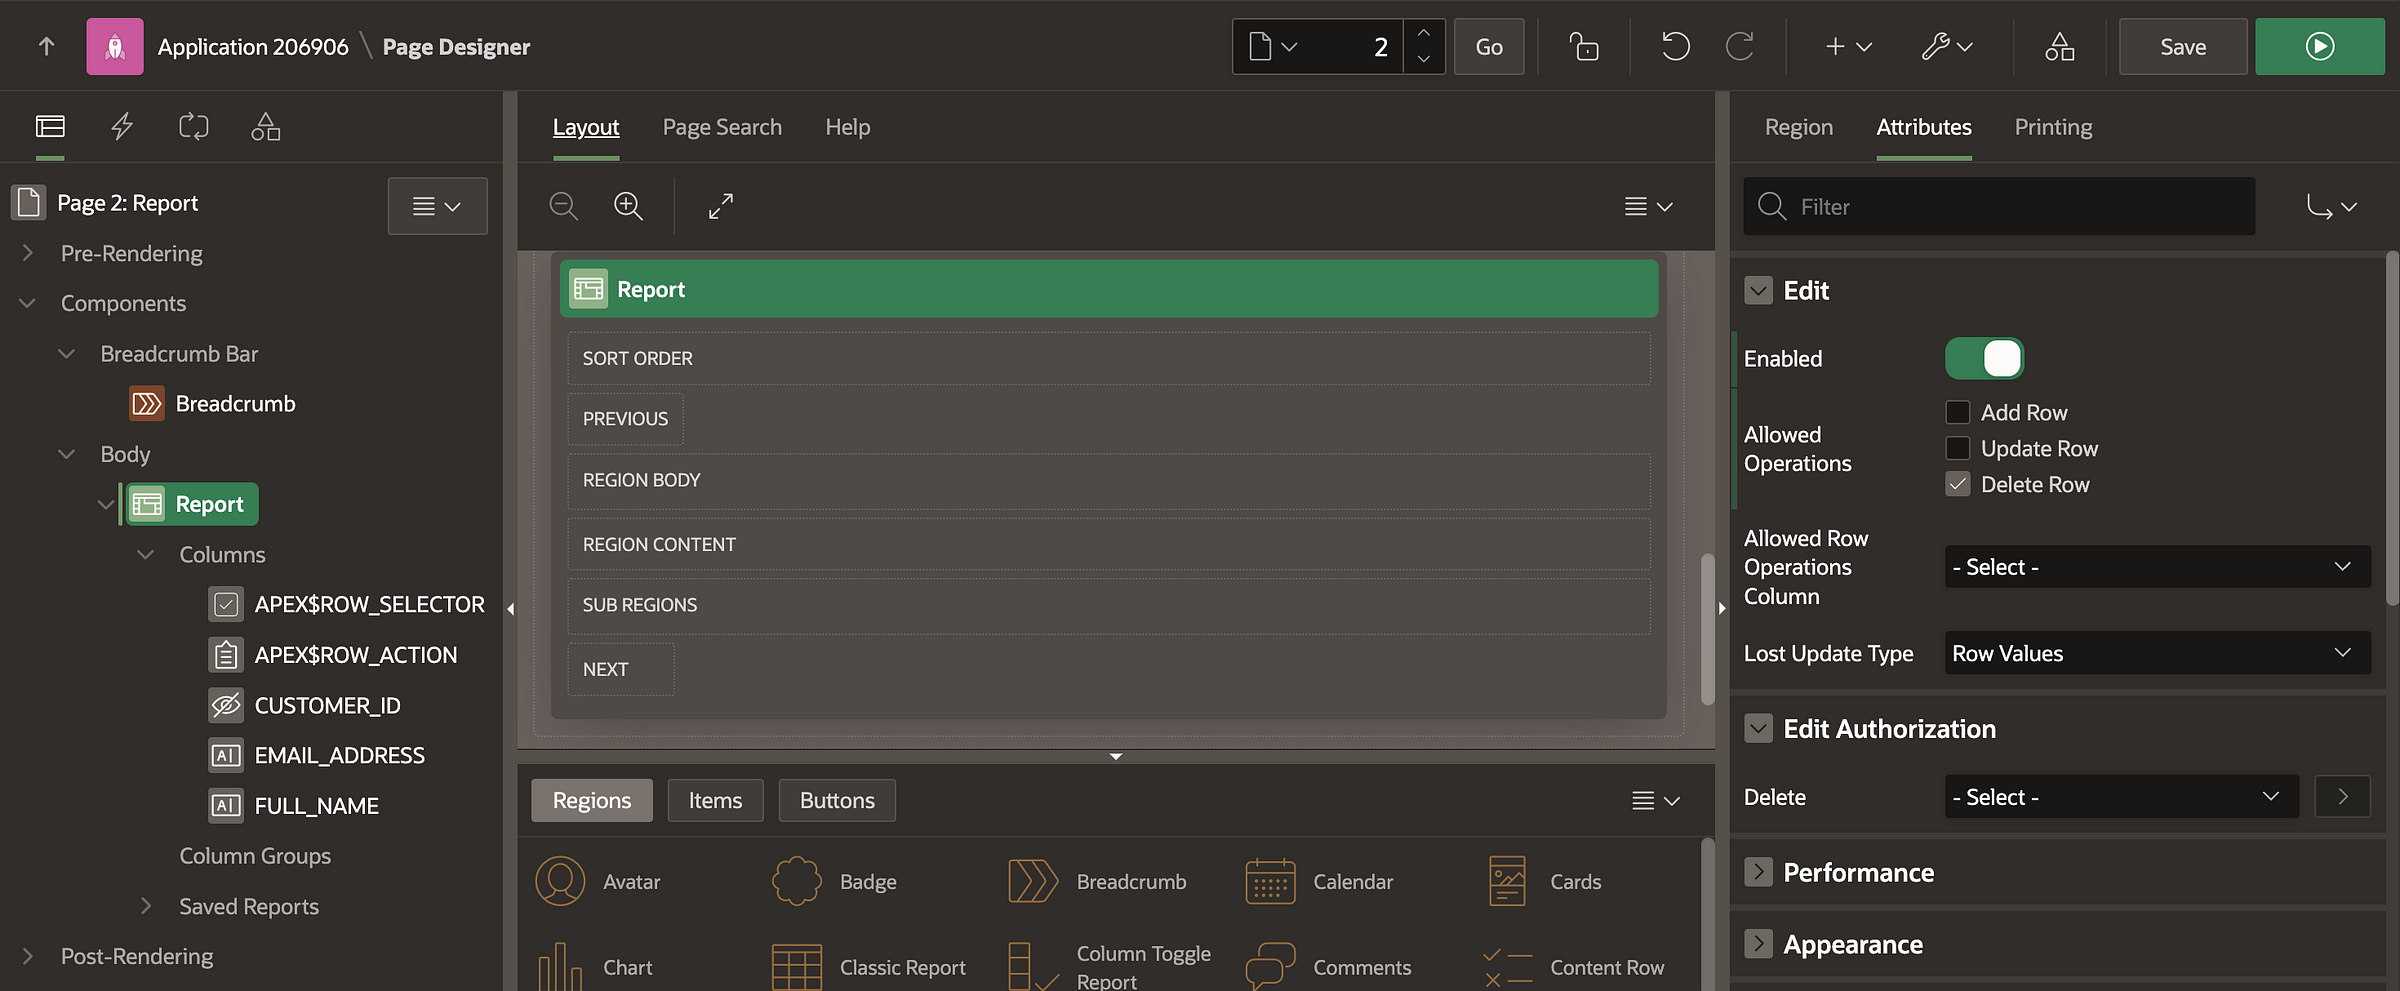
These settings ensure that users can interact with data effectively within the grid.
2. Add Custom JavaScript Code
Navigate to the “Advanced” section under the Interactive Grid region’s attributes. Here’s where we’ll write JavaScript code to add a custom button to the toolbar:
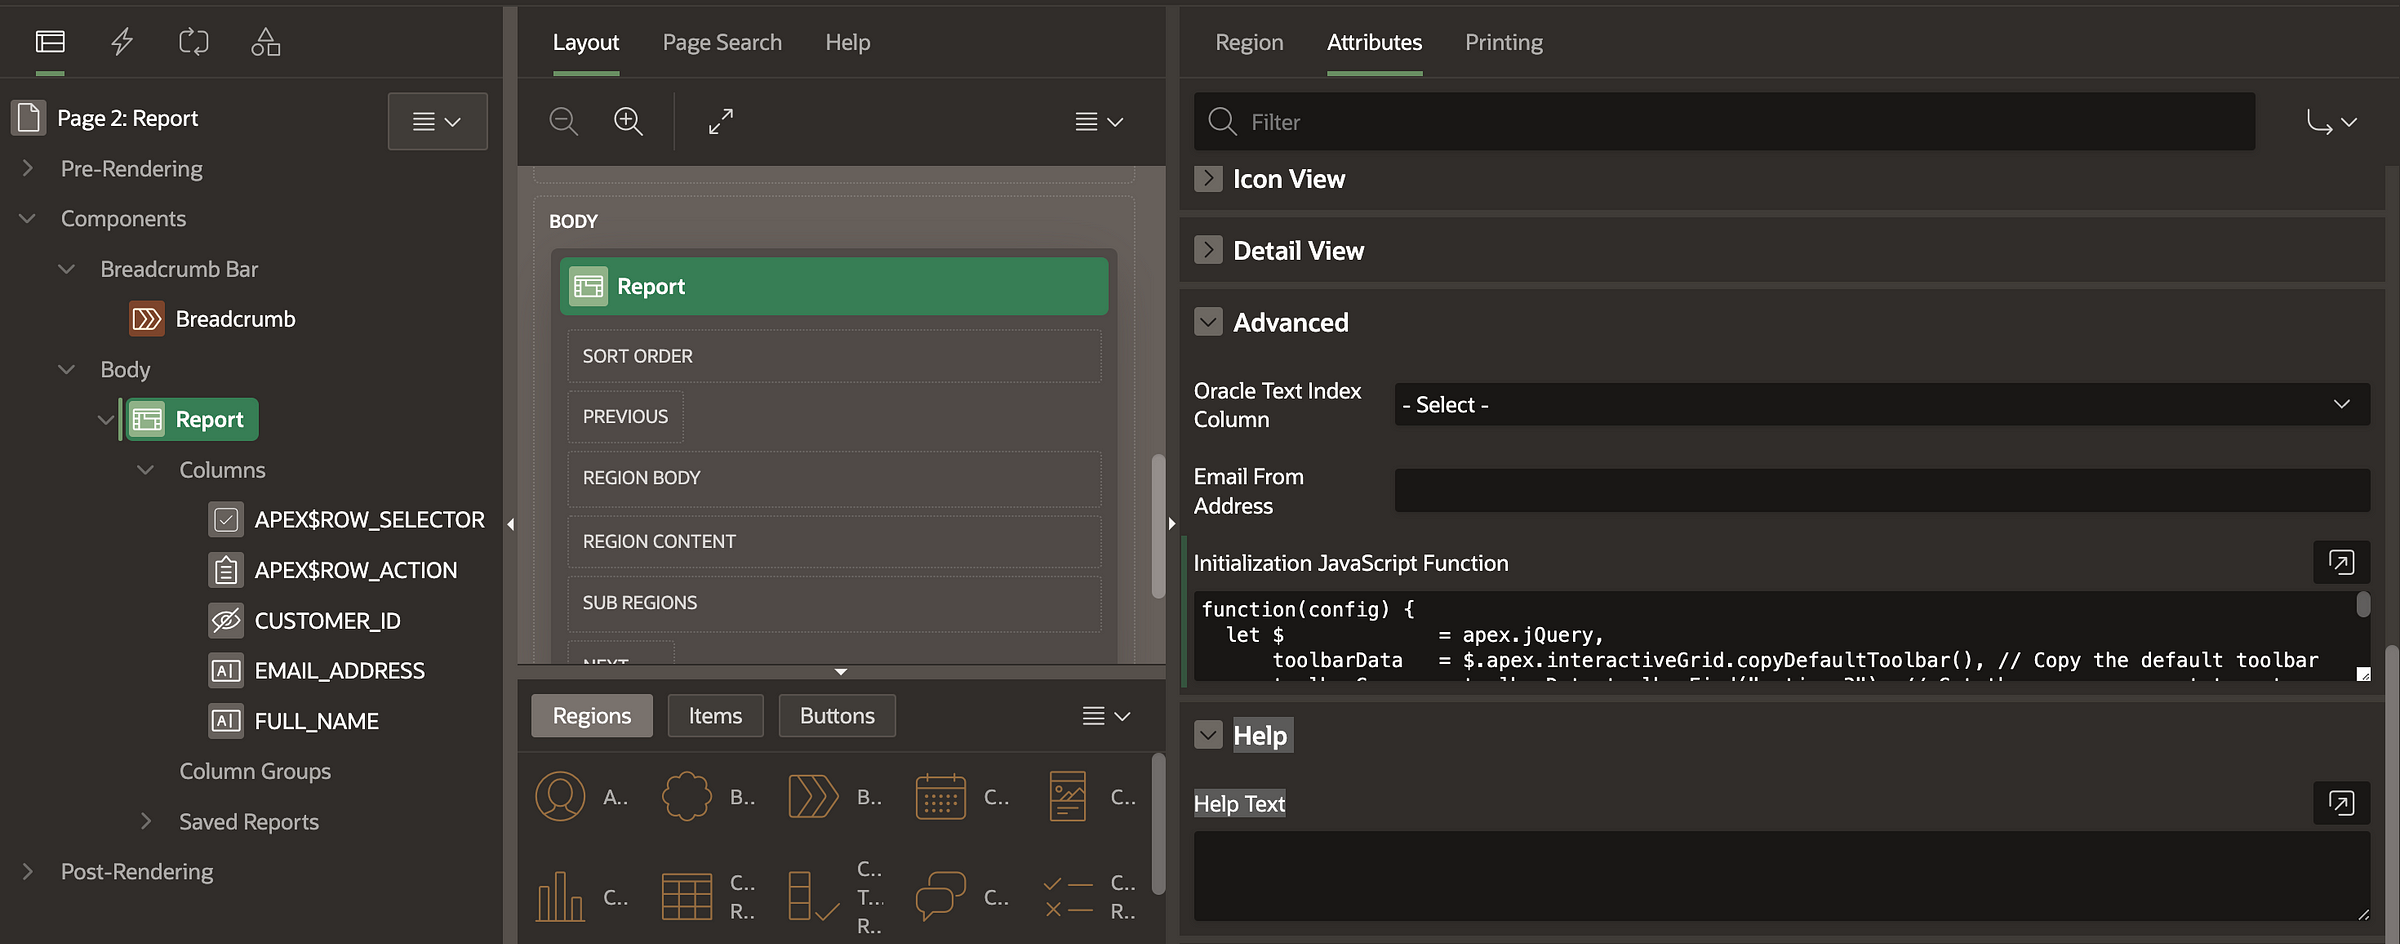
function(config) { let $ = apex.jQuery; // Utilize jQuery provided by APEX for ease of DOM manipulation
// Copy the default toolbar configuration to customize it
let toolbarData = $.apex.interactiveGrid.copyDefaultToolbar();

// Find the toolbar group where you want to add your custom controls
let toolbarGroup = toolbarData.toolbarFind("actions3");

// Define properties for your custom button and add it to the toolbar controls
toolbarGroup.controls.push({
    type: "BUTTON",
    id: "customDeleteButton",
    label: "Delete",
    icon: false, // Set to true and specify an icon class to display an icon
    iconBeforeLabel: true,
    disabled: false,
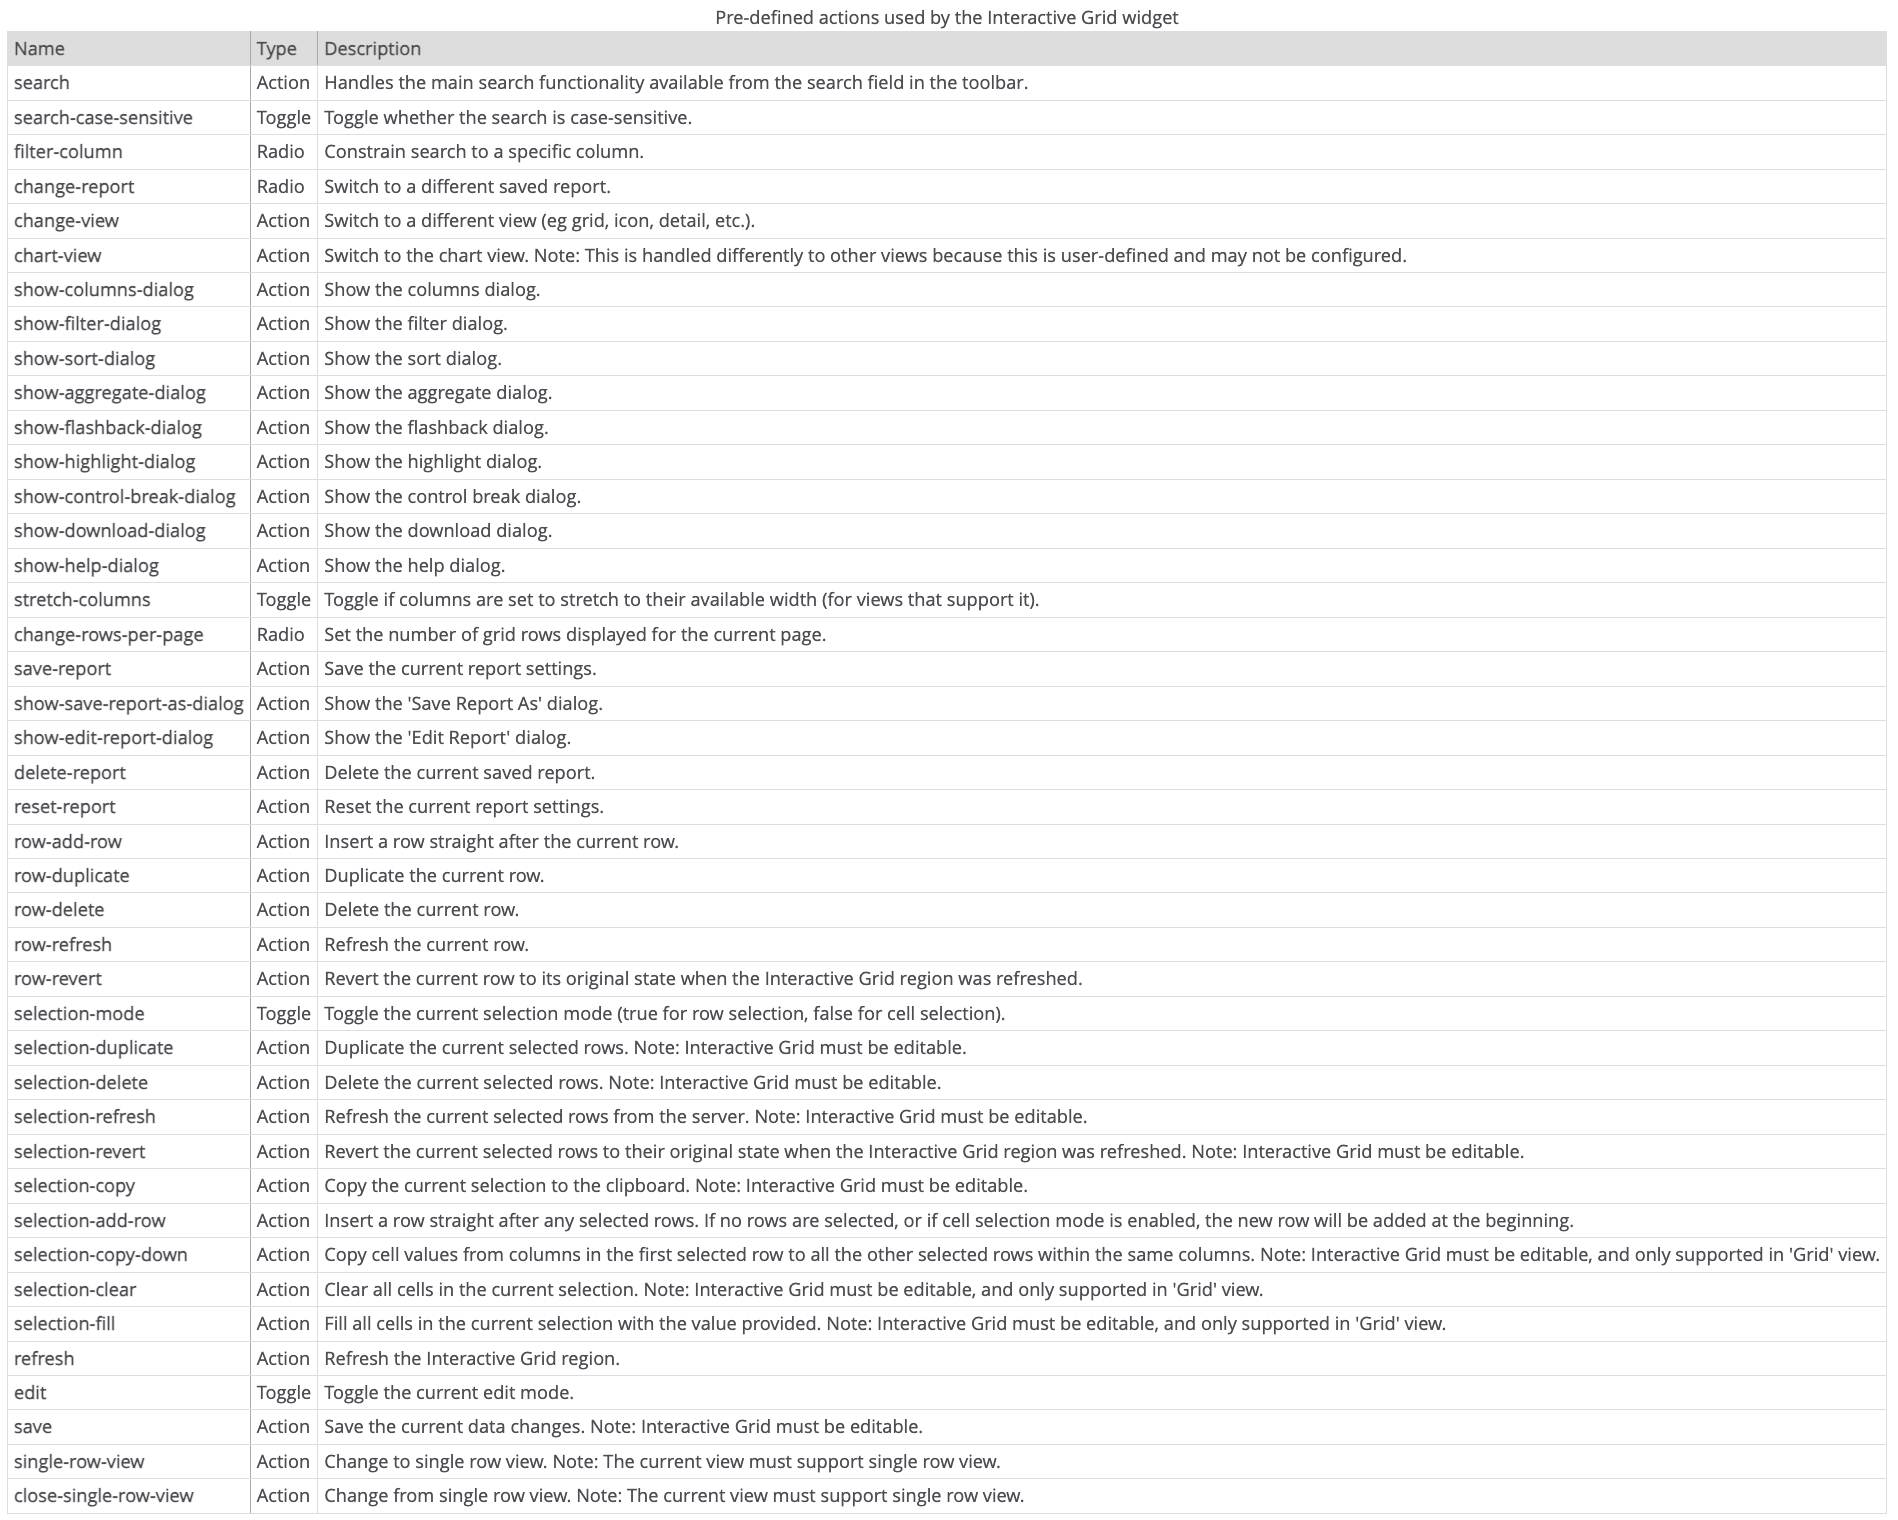
    action: "selection-delete" // Specify the action to perform on click, such as deleting selected rows
});

// Update the configuration with the modified toolbar data
config.toolbarData = toolbarData;

// Return the updated configuration object
return config;
}
- Function Definition: The code begins with a JavaScript function that takes a
_config_parameter. This function initialises the configuration for the Interactive Grid. - Toolbar Customization: Using
_$.apex.interactiveGrid.copyDefaultToolbar()_, we copy the default toolbar configuration. This allows us to customize the toolbar without affecting the original settings. - Adding a Custom Button: We find the specific toolbar group (
_"actions3"_) where we want to add our custom button. Properties like_type_,_id_,_label_, and_action_are defined for the button. Here,_action: "selection-delete"_specifies that clicking the button will perform a delete action on selected rows. - Updating Configuration: We update
_config.toolbarData_with our modified toolbar configuration to ensure the custom button appears in the Interactive Grid. - Updating Configuration: We update
_config.toolbarData_with our modified toolbar configuration to ensure the custom button appears in the Interactive Grid. - Enabling Features: To enable edit and delete functionalities within the grid, we configure
_config.features_:
By following this guide, you’ve learned how to incorporate a custom button while ensuring delete capabilities are readily available within the grid.
Happy developing!